|
Making
a three-leaf clover in PaintShop Pro using vectors.
|
| |
 |
Open a new image of 400 x 400 pixels, 24 bit
color and transparent. |
| |
 |
Use your Preset Shapes tool with:
Shape type = Ellipse
Retain style = unchecked
Antialias = checked
Create as vector = checked
Line width = 1
Style = Default line |
| |
 |
Set both your foreground and background style to Solid Color
(click on the arrows in the style boxes and choose the icon on the left)
and your textures to None (click on the arrows in the texture boxes and
choose the icon on the right). Then click into the style boxes to make
your foreground color medium green (Red = 0, Green = 192, Blue = 0) and
your background color light green (Red = 63, Green = 255, Blue = 64). |
| |
 |
With your right mouse button (this allows you to draw from
the center outwards), draw an ellipse from coordinates (190,190) to
(109,143). Watch your lower left status bar and not your drawing area, it
will keep your hand steadier when you are reading just the first two
numbers and not trying to look at both places at once. |
| |
 |
Click on the Vector Object Selection tool to begin editing,
then click on the "Node Edit" button in the tool options
palette. |
| |
 |
You will see 4 editing points (nodes) on your selection.
These can be pulled, turned, cut, and manipulated to change the shape of
your object. We will need to add two nodes at the left end on either side
of point 1, so press Ctrl (you will see a "+" sign and the word
"add" appear), and touch the shape on the ellipse above and
below node 1. You should have just added two new nodes. |
| |
 |
Touch node 1 and press your left mouse button to grab the
node. The mouse will pull the node to the right as you move your mouse
right. Just move it slightly inward. For editing the two new nodes, click
on one and you will see an arrow. You can grab the arrow and pull to turn
these vertically to smooth each of these nodes. Do this to round – what
will become – the top of the leaf. Select nodes 2 and 4 and pull each
outwards just a bit to give the leaf a rounder edge. |
| |
 |
Now you need to select all the nodes, so move your mouse off
of your ellipse, press your left mouse button down and drag a rectangle
completely around your ellipse. If all the nodes turn black, they are all
selected. If some are not just try again, moving your mouse over all the
nodes. Press Ctrl-C to copy these nodes. Press Ctrl-Q to quit node editing
(or right-click and choose Quit Node Editing). |
| |
 |
Go to Image || Rotate and rotate right by 90 degrees. Click
on the center at (190,190) and move it upwards to (190,86). These
coordinates need not be exact, they are just to give you an idea of where
to position your first leaf so that you have room for all three leaves and
the stem. Click on the "Node Edit" button in your tool options
palette again.
On your image, right-click with your mouse and choose Edit || Paste
from the drop-down menu. Your previous nodes appear. Select one of the
black nodes to pull your pasted selection over to the left, as shown.
|
| |
 |
Click on the center nodes (A on example) of each ellipse
(hold down the Shift key to select more than one node). Press the Delete
key. You now have just the top portions of the leaves remaining. |
| |
 |
Now select the nodes marked "B", right-click and
on the pop-up menu select Edit || Join Select. The two nodes have now
joined together. |
| |
 |
Press Ctrl and add a new node at a point between the
"B" nodes. Right-click again and select Node Type || Cusp from
the pop-up menu. This will allow you to make an angle with the arrows that
appear within the selected node. Drag the node down and over as shown, and
move the arrows up in the direction of the leaves.
Press Ctrl-Q to quit node editing.
|
| |
 |
The ellipse is still selected; go to Image || Mirror. Click
on "Node Edit" again and press Ctrl-V to paste your previously
copied nodes once again. Move the leaf a bit to the right. Select the
centermost node (A) of the newest leaf and press delete. Click on the
nodes marked "B" (hold down the Shift key to select both).
Right-click with your mouse and select Edit || Join Select. As before,
hold down the Ctrl key and add a new node between the two newly joined
nodes. Right-click and change the Node Type to Cusp, pull node right and
down slightly and pull arrow tips to bend an angle.
Press Ctrl-Q to quit node editing.
|
| |
|
Select the Preset Shapes tool and change the Shape Type to
Rectangle (all other settings as above). |
| |
 |
On the lower half of your page, draw a narrow rectangle from
coordinates (190,272) to (208,384). This will become the stem of your
clover. |
| |
|
Select your Vector Object Selection tool and click on the
"Node Edit" button in your tool options palette. |
| |
 |
Select all the stem nodes by drawing a rectangle around
them, press Ctrl-C to copy them and then press the Delete key. Then press
Ctrl-Q to quit node editing. |
| |
 |
In your layer palette, click on the vector layer and select
the "Ellipse" layer. Your ellipse should now be selected. Click
on "Node Edit". Press Ctrl-V (or right-click and go to Edit ||
Paste in the pop-up menu), and your stem nodes reappear. |
| |
 |
Move the stem nodes upwards, deselect them all by clicking
somewhere into the image, and then select just the top left node,
right-click, select Edit || Break, and hit the Delete key. Press the Shift
key and select the remaining lower left leaf node, right-click and choose
Edit || Join Select. Click on the right top node of the stem, press the
Shift key and select the remaining lower right leaf node, right-click, and
go to Edit || Join Select. The stem is now joined to the clover leaf. |
| |
 |
In the middle of the stem sides press Ctrl and add a node to
either side, right click and choose Node Type || Symmetric (which will
produce curves when you pull on the arrow), pull slightly inwards to curve
the stem. Pull the lower nodes to create a slight angle. |
| |
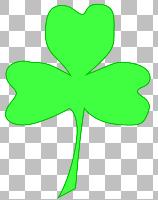 |
If any of the leaves need smoothing or aligning, just select
the nodes and pull slowly on them to produce curves. Once your leaf is the
way you want it, right click on your vector layer and select "Convert
to Raster" (you may want to save it with another name as a vector
image prior to this, though).
You can now apply any filters, gradients, drop shadow, etc. to the
leaf. You can also merge visible layers and save it as a tube (resizing
with the Deform tool, if desired).
|